
The 110cc wiring diagram is an essential tool for installing and troubleshooting electrical systems. It provides a clear visual guide, ensuring proper functionality and safety.
Overview of the Importance of Wiring Diagrams
Wiring diagrams are crucial for understanding and working with electrical systems in 110cc engines. They serve as a detailed blueprint, illustrating the layout and connections of wires, components, and circuits. These diagrams are essential for installing, troubleshooting, and maintaining the electrical system, ensuring proper functionality and safety. By following a wiring diagram, users can identify each component, its location, and its connections, making repairs and modifications more efficient. They also help prevent electrical hazards by guiding safe and correct connections. Whether you’re a novice or an experienced mechanic, a wiring diagram is an indispensable tool for diagnosing issues, avoiding costly mistakes, and ensuring the system operates as intended. Regular use of wiring diagrams promotes better understanding and maintenance of the 110cc engine’s electrical setup.
Understanding the Basics of 110cc Engine Wiring
Understanding the basics of 110cc engine wiring involves familiarizing yourself with the key components and their connections. The wiring system is designed to power essential functions like the ignition, starter motor, and lighting. It typically includes a battery, ignition switch, starter solenoid, and various electrical accessories. The wiring harness acts as the central hub, connecting these components securely. Color-coded wires help identify their purposes, ensuring accurate connections. Proper wiring is critical for safety and performance, preventing short circuits and electrical failures. By grasping these fundamentals, you can effectively use the wiring diagram to install, troubleshoot, or maintain your 110cc engine’s electrical system. This knowledge is vital for both novice enthusiasts and experienced mechanics, ensuring reliable operation and minimizing risks.

Understanding the 110cc Wiring Diagram
The 110cc wiring diagram provides a clear visual guide for installing, troubleshooting, and understanding the electrical system, ensuring proper functionality and safety.
Key Components of the Wiring Diagram
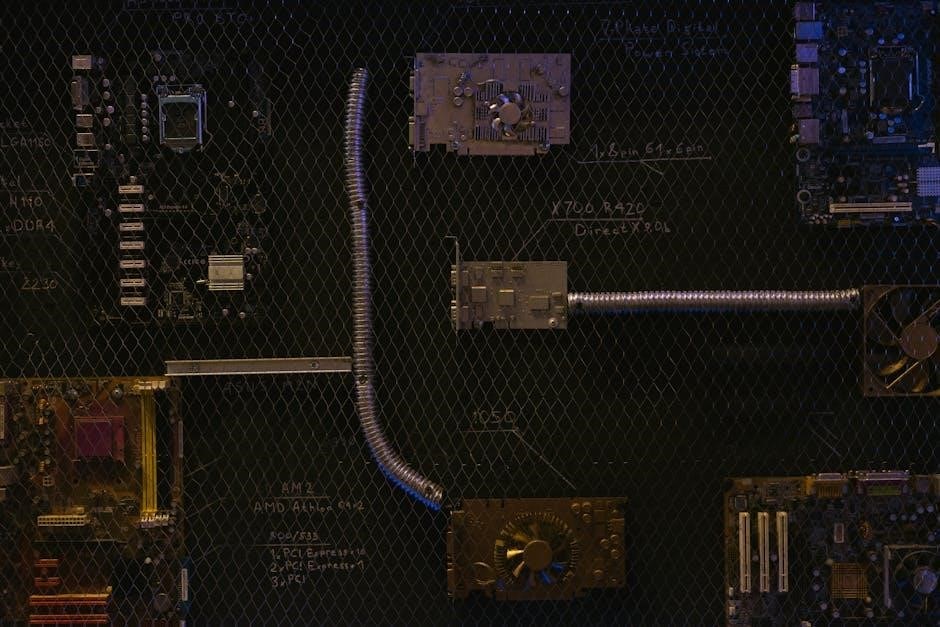
The 110cc wiring diagram includes essential components like the battery, ignition system, starter motor, and solenoid. These elements are crucial for the electrical system’s functionality. The battery powers the ignition, while the starter motor initiates engine operation. The solenoid acts as a relay, controlling the flow of electrical current. Additionally, the diagram outlines connections for lighting and accessories, ensuring proper electrical distribution. Understanding these components and their interconnections is vital for effective installation and troubleshooting. The diagram provides a clear visual representation, making it easier to identify and repair faulty wires or connections. By following the diagram, users can ensure all components work harmoniously, maintaining the engine’s performance and safety. This detailed breakdown simplifies complex electrical systems, making DIY repairs and maintenance more accessible.
Reading and Interpreting the Diagram
Reading and interpreting the 110cc wiring diagram requires attention to detail and understanding of its symbols and color coding. The diagram visually represents the electrical system, showcasing connections between components like the battery, ignition, and starter motor. Each wire is color-coded to simplify identification, while symbols denote specific parts or functions. By tracing the wires and their pathways, users can identify how power flows through the system. Labels and annotations provide additional clarity, helping to pinpoint components and their roles. For beginners, it’s essential to cross-reference the diagram with the vehicle’s parts list to ensure accuracy. Proper interpretation allows for efficient troubleshooting and installation, ensuring the electrical system operates safely and effectively; Patience and careful study are key to mastering the diagram and successfully completing DIY projects.

Tools and Materials Needed
Essential tools include multimeters, wire cutters, and connectors. Materials like electrical tape, heat shrink tubing, and safety gear are crucial for secure and safe wiring connections.
Essential Tools for Wiring Diagram Installation
Installing a 110cc wiring diagram requires specific tools to ensure accuracy and safety. A multimeter is crucial for testing voltage and continuity, while wire cutters and strippers help prepare wires. Pliers and screwdrivers are necessary for securing connections. A soldering iron and heat gun are useful for permanent joints and heat shrink tubing. Safety gear, such as gloves and goggles, protects against electrical shocks and debris. A wiring harness kit and connectors are essential for making reliable connections. A clean workbench and good lighting aid in organizing and visualizing the wiring process. These tools ensure a professional and efficient installation, minimizing errors and enhancing overall system performance. Proper tools are vital for a successful and safe wiring diagram setup.
Recommended Materials for Safe Connections
For safe and reliable connections in a 110cc wiring diagram, high-quality materials are essential. Heat-resistant tubing and shrink wrap protect wires from heat damage. High-grade copper wires ensure excellent conductivity and durability. Waterproof connectors and seals prevent moisture interference, while electrical tape and silicone adhesive secure connections. A wiring harness kit provides pre-terminated wires for easy installation. Fuses and circuit breakers are critical for overcurrent protection. Grommets and cable ties organize wires, reducing wear and tear. Using these materials ensures a safe, efficient, and long-lasting electrical system. Proper insulation and protection against environmental factors are vital for maintaining functionality. These materials are designed to withstand the demands of a 110cc engine, ensuring reliability and minimizing the risk of electrical failures. Always prioritize quality to guarantee a secure and durable wiring setup.

Safety Precautions
Always disconnect the battery before starting work. Wear protective gear and ensure proper ventilation. Follow electrical safety guidelines to avoid shocks or system damage.
General Safety Tips for Working with Electrical Systems
When working with electrical systems, always disconnect the battery first to prevent accidental power supply. Use insulated tools to avoid electric shocks. Ensure proper grounding and wear protective gear, including gloves and safety glasses. Never work in wet conditions or near open flames. Keep the workspace well-ventilated and free from clutter. Label wires clearly before disconnecting them to ensure proper reconnection. Avoid overloading circuits and use fuses or circuit breakers as specified. Regularly inspect wires for damage or wear. Follow the wiring diagram instructions carefully to maintain system integrity. If unsure, consult a professional or the manufacturer’s manual. Safety should always be the top priority to prevent injuries and system damage.
Specific Safety Measures for 110cc Engines
When working on a 110cc engine, always disconnect the battery before starting any repairs to prevent unexpected power surges. Use insulated tools to handle electrical components safely. Ensure the engine is cool and in a well-ventilated area to avoid heat-related hazards. Never bypass safety features like fuses or circuit breakers, as this can lead to system overload. Keep loose clothing and long hair tied back to prevent entanglement with moving parts. Avoid touching electrical components with bare hands to reduce the risk of shock. Regularly inspect wires for fraying or damage, and replace them if necessary. Never attempt modifications without consulting the wiring diagram or manufacturer’s guidelines. Always follow proper grounding procedures to prevent electrical fires. If unsure about any step, seek professional assistance to ensure safety and system integrity.
Step-by-Step Installation Guide
The step-by-step installation guide offers clear instructions for connecting components like the battery and ignition, ensuring safety and proper functionality for both novices and experienced mechanics.
Preparing the Wiring Harness
Preparing the wiring harness is the first step in installing the 110cc wiring diagram. The wiring harness serves as the backbone of the electrical system, connecting all components seamlessly. Start by carefully inspecting the harness for any signs of damage or wear. Use the diagram to identify each wire and its corresponding connector, ensuring they match the components of your 110cc engine. Next, organize the wires by bundling them together to prevent tangling and potential damage. Secure the harness using zip ties or clips to keep it tidy and protected from heat sources or moving parts. Finally, connect the main power supply wires to the battery and ignition system, following the diagram’s instructions for proper polarity and connections. This step ensures a safe and efficient electrical setup for your 110cc engine.
Connecting the Battery and Ignition System
Connecting the battery and ignition system is a critical step in the 110cc wiring diagram installation. Begin by locating the battery and ensuring it is fully charged. Identify the positive and negative terminals, as incorrect connections can cause damage. Use the wiring diagram to determine the correct wires for the ignition switch and starter motor. Connect the positive terminal to the ignition system, ensuring proper polarity to avoid short circuits. Next, attach the negative terminal to the engine’s grounding point. Secure all connections tightly and double-check the wiring diagram for accuracy. Finally, test the ignition system by turning the key to ensure it activates the starter motor. Proper connections here are essential for reliable engine performance and safety. Always follow the diagram’s instructions to avoid electrical malfunctions. This step ensures your 110cc engine starts smoothly and operates efficiently.

Installing the Starter Motor and Solenoid
Installing the starter motor and solenoid is a key step in the 110cc wiring diagram process. Begin by locating the starter motor and ensuring it is properly mounted to the engine. Refer to the wiring diagram to identify the correct wires for the solenoid. Connect the positive wire from the battery to the solenoid’s input terminal, and the output terminal to the starter motor. Ensure all connections are secure and free from corrosion; Next, connect the ignition switch wire to the solenoid’s control terminal. Double-check the wiring diagram to confirm proper connections. Once installed, test the starter motor by turning the ignition key to ensure it engages smoothly. Proper installation of the starter motor and solenoid is crucial for reliable engine starting and overall performance. Always follow the wiring diagram’s instructions to avoid electrical issues and ensure safety.
Wiring the Lighting and Electrical Accessories
Wiring the lighting and electrical accessories is a critical step in the 110cc wiring diagram process. Begin by identifying the wires designated for the headlights, taillights, and any additional accessories like turn signals or a horn. Refer to the wiring diagram to locate the correct terminals on the ignition switch and battery. Connect the positive wire from the battery to the ignition switch, ensuring it powers the lighting circuit. Next, connect the output wire from the ignition switch to the lighting components, following the diagram’s instructions. Make sure all connections are secure and insulated to prevent short circuits. Test each accessory individually to confirm proper functionality. Proper wiring ensures safety and reliability, while adhering to the diagram prevents electrical malfunctions. Regularly inspect connections to maintain optimal performance and avoid potential issues.

Troubleshooting Common Issues
Use the wiring diagram to identify faulty connections and diagnose electrical malfunctions. Regular inspections and proper wiring practices help prevent issues and ensure reliable performance.

Identifying and Repairing Faulty Connections
Identifying faulty connections in a 110cc wiring system requires a systematic approach. Start by consulting the wiring diagram to locate the suspected area. Use a multimeter to test for continuity, voltage, and resistance, ensuring wires are not shorted or open. Visually inspect connectors for signs of damage, corrosion, or wear. If a connection is faulty, disconnect the battery before attempting repairs. Replace damaged wires or connectors with compatible parts, ensuring secure and clean connections. Apply dielectric grease to protect against corrosion. After repairs, reconnect the battery and test the system to confirm functionality. Regular maintenance and inspections can prevent such issues, ensuring reliable performance and safety. Always follow safety guidelines when working with electrical systems to avoid accidents or further damage.
Diagnosing Electrical System Malfunctions
Diagnosing electrical system malfunctions in a 110cc engine begins with consulting the wiring diagram to trace connections and identify potential fault points. Start by checking fuses, relays, and connectors for signs of damage or corrosion. Use a multimeter to test voltage levels and continuity across circuits. If a component like the ignition coil or starter motor fails, refer to the diagram to isolate its wiring. Common issues include loose connections, short circuits, or faulty ground wires. By systematically testing each component and comparing results with the wiring diagram, you can pinpoint the source of the malfunction. For beginners, it’s crucial to start with obvious issues before moving to more complex diagnostics. Patience and a methodical approach ensure accurate troubleshooting and effective repairs, minimizing downtime and ensuring safe operation. Always prioritize safety when working with electrical systems to avoid further damage or injury.
Maintenance Tips
Regular inspections of wiring and connections are crucial for maintaining optimal performance. Clean any corrosion and ensure all connections are secure. Referencing the wiring diagram helps identify potential issues early. Routine checks ensure safe and efficient operation. Following these maintenance tips guarantees reliability and extends the electrical system’s lifespan.
Regular Checks to Ensure Proper Functionality
Regular checks are vital to maintain the electrical system’s functionality. Start by inspecting all wires for signs of wear, fraying, or corrosion. Ensure connections are tight and secure, as loose connections can lead to malfunctions. Use the wiring diagram to verify that each component is correctly connected. Check the battery terminals for cleanliness and proper tightening. Test the ignition system and starter motor for responsiveness. Inspect lighting and electrical accessories to ensure they are functioning as intended. Refer to the wiring diagram to trace any issues quickly. Regular lubrication of moving parts and cleaning of connectors can prevent corrosion. By following these steps, you can ensure the electrical system operates smoothly and safely. Regular maintenance also helps prevent unexpected breakdowns and extends the lifespan of the wiring components. Always use the wiring diagram as a reference for accurate diagnostics and repairs.
Preventative Measures to Avoid Wiring Issues
To prevent wiring issues, always refer to the wiring diagram for accurate connections. Protect wires from heat sources and moisture, as these can damage insulation and cause shorts. Route wires securely in the harness to avoid abrasion. Avoid overloading circuits, as this can lead to system failures. Regularly inspect connectors for corrosion and clean them if necessary. Use high-quality wires and components to ensure durability. Keep the wiring diagram handy for quick reference during repairs or upgrades. By following these measures, you can minimize the risk of electrical malfunctions. Additionally, ensure all connections are tightly secured to prevent loose wires. Store the wiring diagram in a safe place for future use. These preventative steps will help maintain the integrity of your 110cc engine’s electrical system and ensure long-term reliability.
Mastery of the 110cc wiring diagram ensures proper installation, safety, and functionality. Use this guide to troubleshoot and maintain your electrical system effectively for optimal performance and reliability.
Final Thoughts on Mastering the 110cc Wiring Diagram

Mastering the 110cc wiring diagram is a valuable skill that enhances safety, functionality, and performance. By understanding the connections and components, you can confidently perform DIY repairs and maintenance. This guide provides clear instructions and detailed diagrams, making it accessible for both novices and experienced mechanics. Regular checks and troubleshooting tips ensure long-term reliability, preventing future issues. Whether installing, diagnosing, or maintaining, this resource empowers you to handle electrical systems with precision. Embrace the process, and you’ll gain the confidence to keep your 110cc engine running smoothly for years to come. Remember, proper wiring is key to optimal performance and safety, making this knowledge indispensable for any enthusiast or professional.